Welcome to Moda Fabrics!
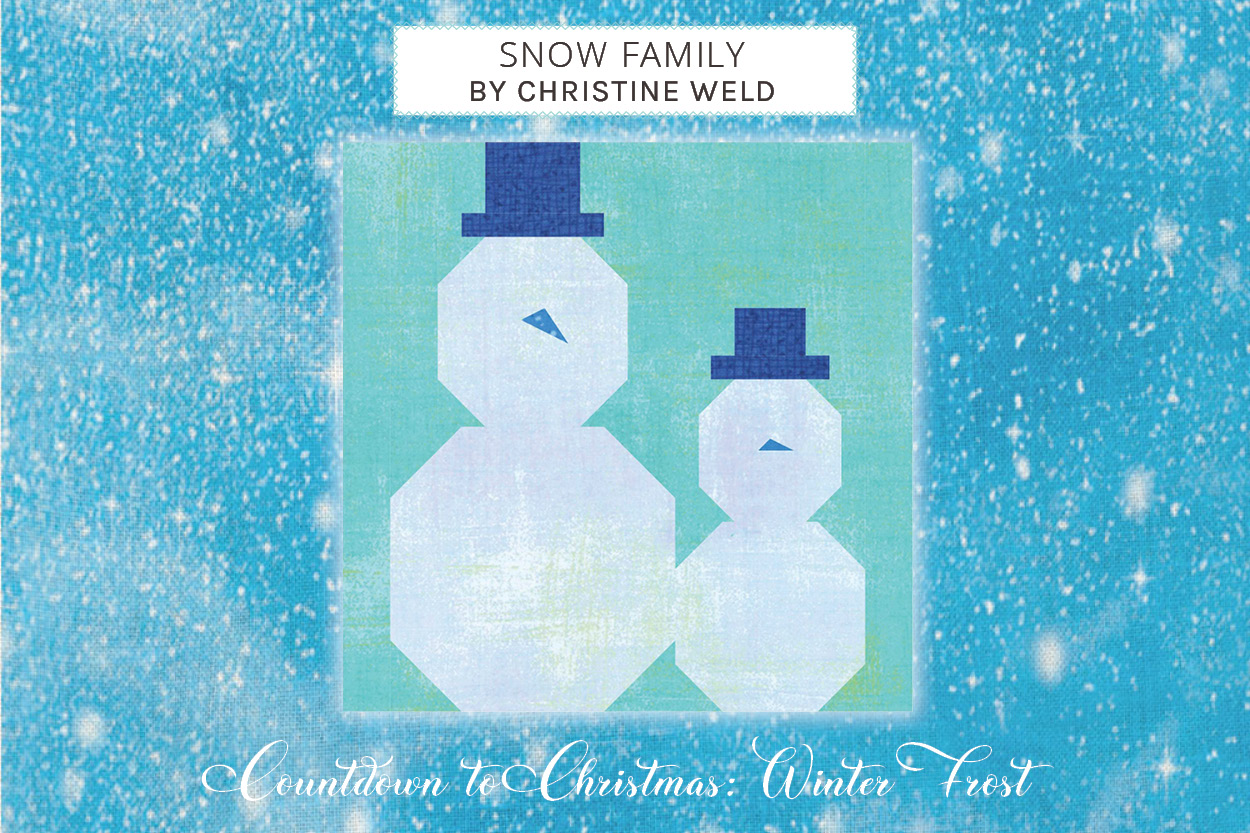
Winter Frost - Snow Family
Winter Frost - Snow Family

Snow Family is one of the block options in the 2020 Countdown to Christmas - Winter Frost. For more info about this quilt-along, check out the Frequently Asked Questions and join our Moda Bake Shop Bakers group. Find all the blocks {here}.
Chef's Notes:
Press and starch all fabrics prior to cutting. Use a scant 1/4" seam.
YIELD
12" finished block
INGREDIENTS
From fabric 1, cut:
{A} (2) 4½” squares
{B} (1) 6½” square
{C} (1) 3½” square
From fabric 2, cut:
{D} (8) 1½” squares
{E} (4) 2” squares
{F} (4) 1¼” squares
{G} (2) 1” squares
{I} (2) 1½” by 2”
{K} (2) 1¼” by 1”
{M} (2) 1¾” by 1½”
{O} (2) 3½” by 1”
{P} (1) 4½” by 4”
{Q} (2) 1½” by 6½”
{R} (2) 12½” by 1½”
From fabric 3, cut:
{H} 1” by 3½”
{J} 2½” by 2”
{L} 1” by 3”
{N} 2” by 1½"
From fabric 4, cut:
{S} (2) triangles cut from scrap orange fabric to make carrot nose as desired*
*Remember to add a seam allowance if you plan to needle turn applique
INSTRUCTIONS
STEP 1. MAKE SNOWBALLS
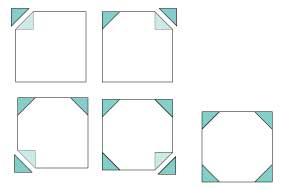
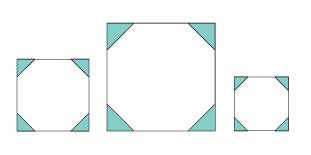
Take (1) 4½” square of Fabric 1 and (4) 1½” squares of Fabric 2. Draw a line diagonally across the back of each square of Fabric 2. Place a block in each corner of the Fabric 1 square. With RST, sew directly on drawn line. Trim ¼” away. Repeat for each side.

Repeat for second 4½” square of Fabric 1.
Repeat using 6½” square from Fabric 1 and 2” squares of Fabric 2.
Repeat using 3½” square from Fabric 1 and 1¼” squares of Fabric 2.

STEP 2. MAKE TOP HATS
LARGE TOP HAT
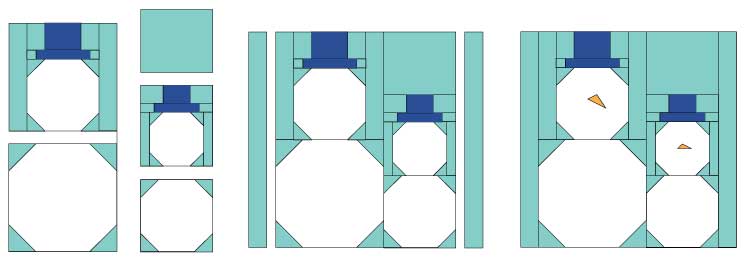
Sew 1” square of Fabric 2 to each side of 1” by 3 ½” rectangle of Fabric 3. Sew 1 ½” by 2” Fabric 2 rectangle to each side of 2 ½” by 2” Fabric 3 rectangle. Sew brim piece to bottom of hat top.

SMALL TOP HAT
Sew 1 ¼” by 1” piece of Fabric 2 to each side of 1” by 3” rectangle of Fabric 3. Sew 1 ¾” by 1 ½” Fabric 2 rectangle to each side of 2” by 1 ½” Fabric 3 rectangle.
Sew brim piece to bottom of hat top.
STEP 3. ASSEMBLE BLOCK
SMALL SNOWMAN
Take 3½” snowball block. Sew 3½” by 1” pieces of Fabric 2 to each side. Sew one of the 4½” snowball blocks below. Sew small hat section above smaller snowball block. Sew 4½” by 4” piece of Fabric 2 above small hat section.
LARGE SNOWMAN
Sew large hat section to 4½” snowball block. Sew 1½” by 6½” piece of Fabric 2 to each side of unit. Sew 6½” snowball block to bottom of unit. Sew snowman son and dad together. Sew 12½” by 1½” strip of Fabric 2 to each side of block.
Take small scraps of orange and cut small triangles. Applique on each snowman for noses.

Christine Weld
If you missed any of the earlier posts -
- Winter Frost - Icy Windows
- Winter Frost - Ohio Snowball
- Winter Frost - North Wind
- Winter Frost - Icicle Star
- Winter Frost - Frozen
- Winter Frost - Flurry
- Winter Frost - Ice Crystal
- Winter Frost - Snow Drop
- Winter Frost - Your Paws in Mine
- Winter Frost - Festival of Friends
- Winter Frost - Snow Bunting
- Winter Frost - Starflake
- Winter Frost - Jack Frost
- Winter Frost - Winter Palace
- Winter Frost - Countdown to Christmas 2020 - Fabrics/Yardage/Info
- Winter Frost - FAQs
- Winter Frost - Bear Creek Setting Option
- Winter Frost - Snowy Peaks Setting Option
- Winter Frost - Yardage PDF

Comments