Welcome to Moda Fabrics!
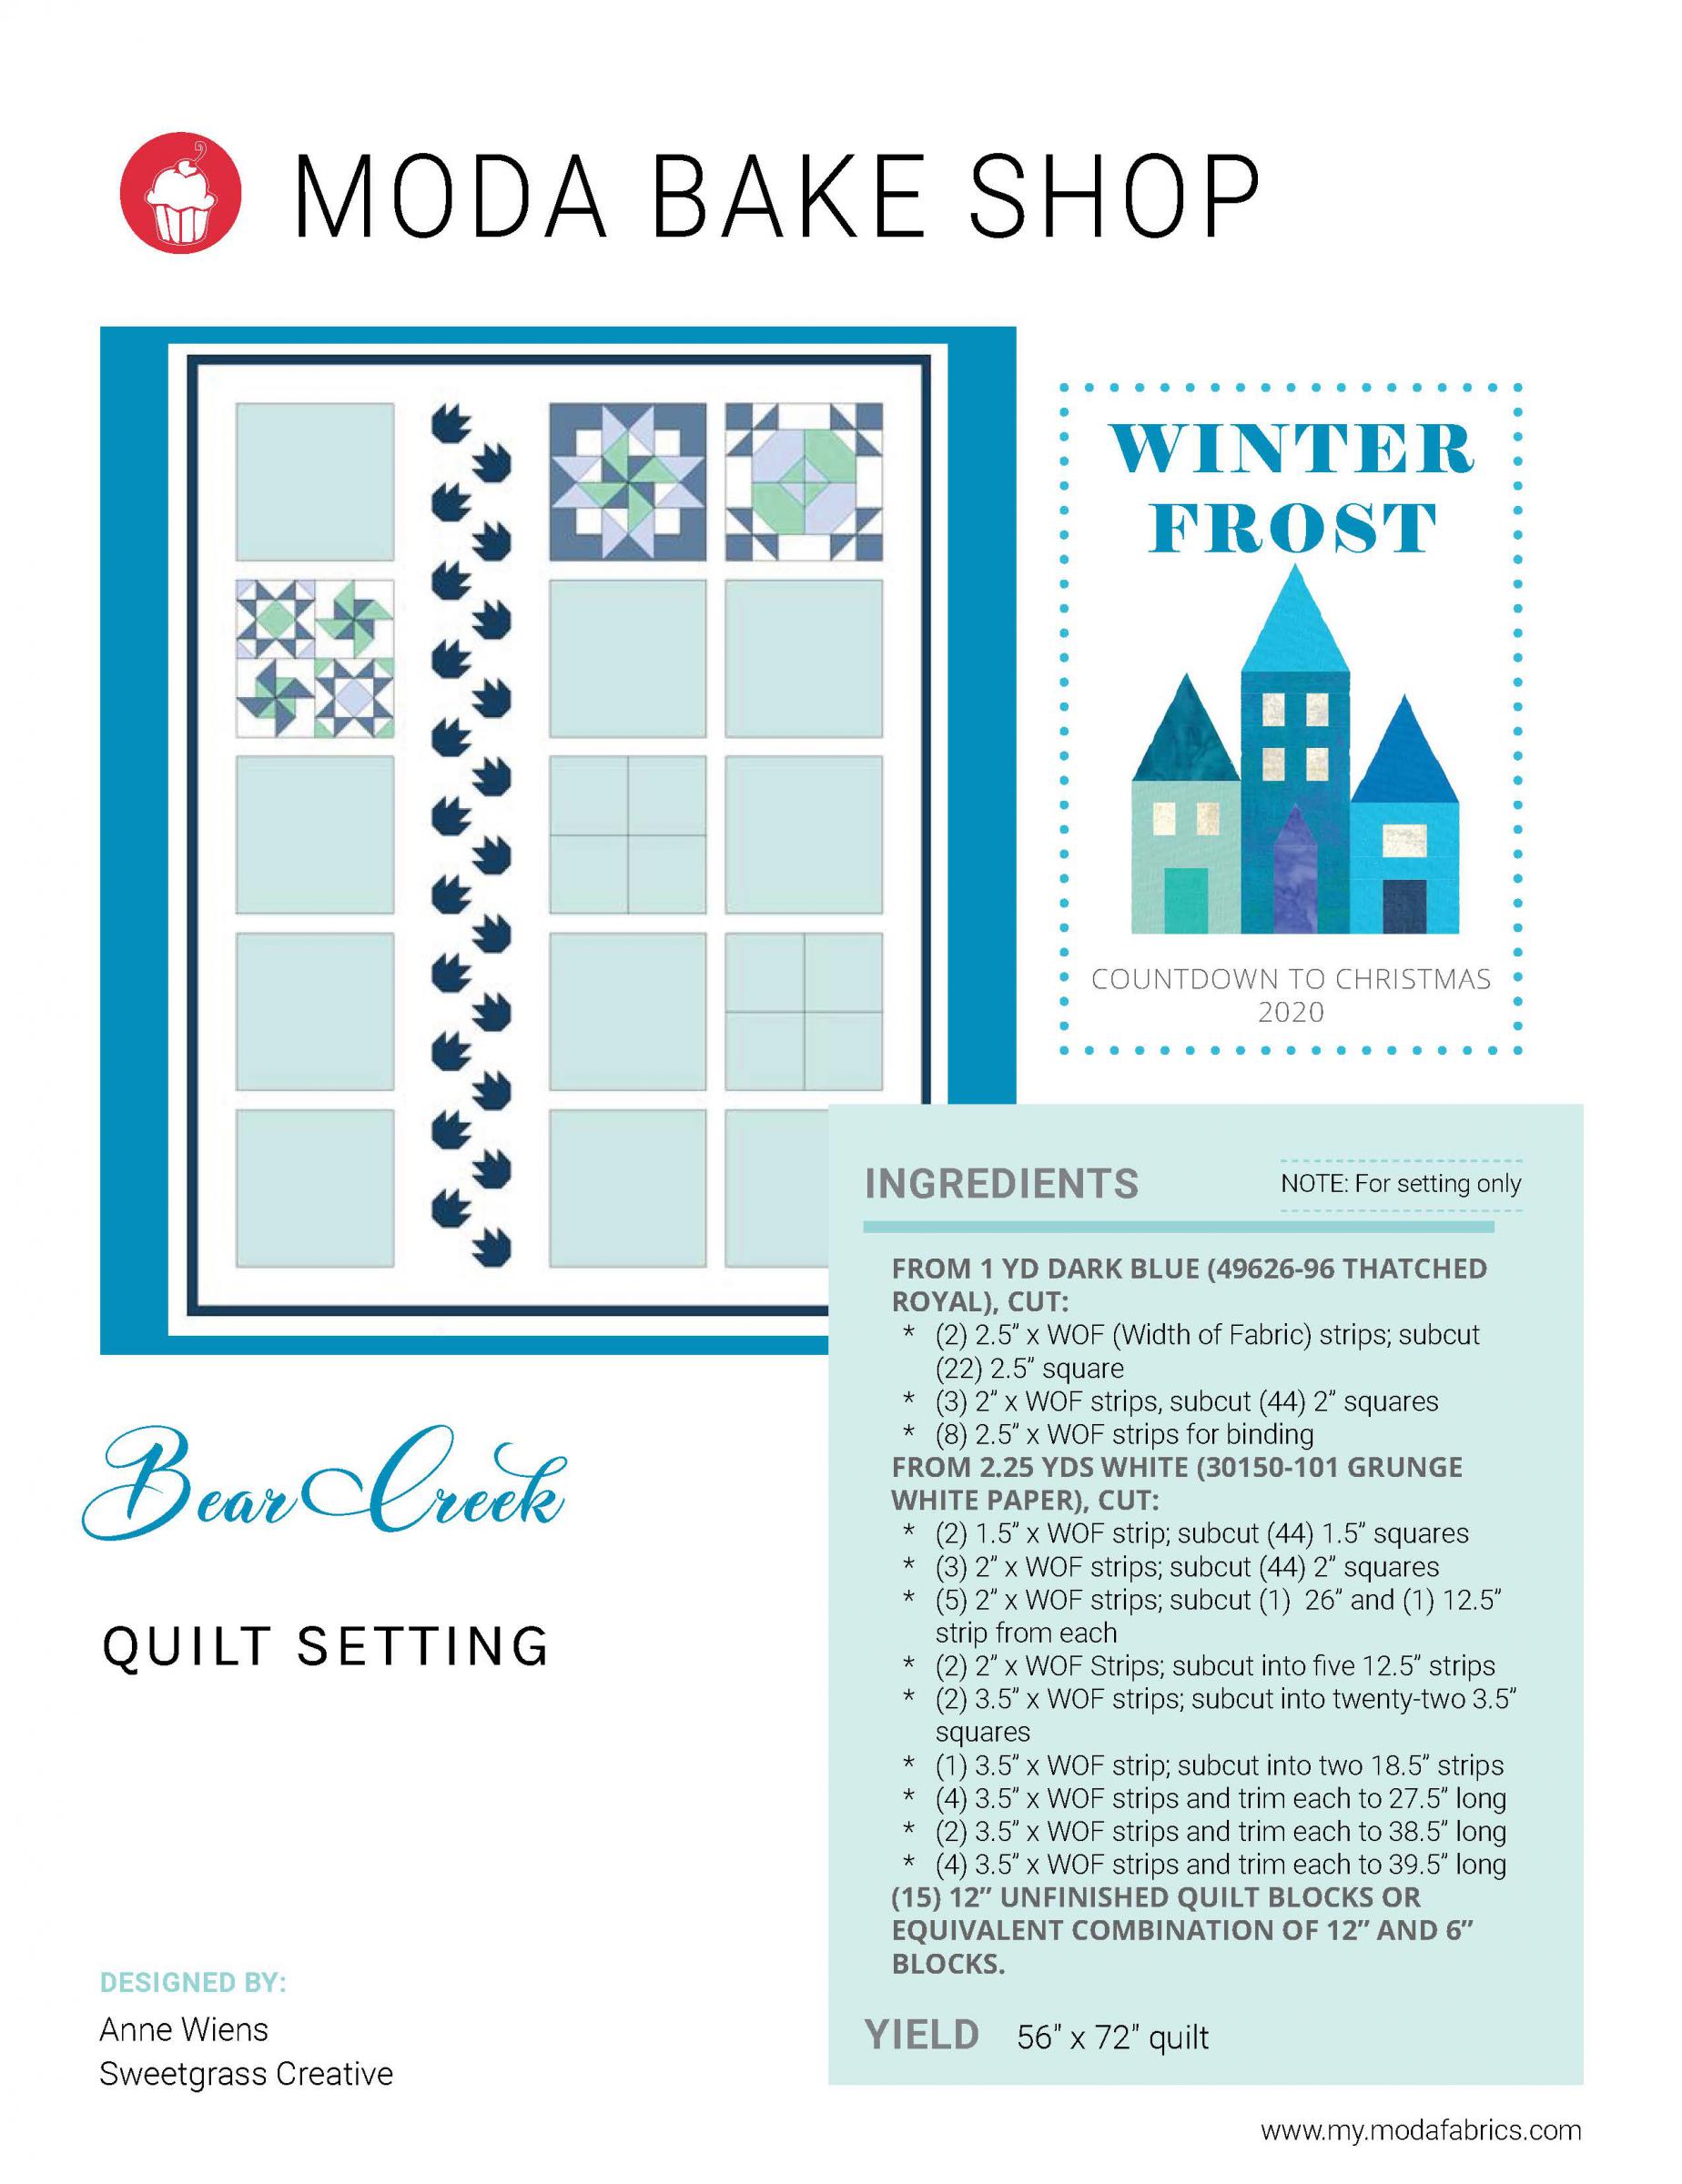
Winter Frost - Bear Creek Setting
Winter Frost - Bear Creek Setting
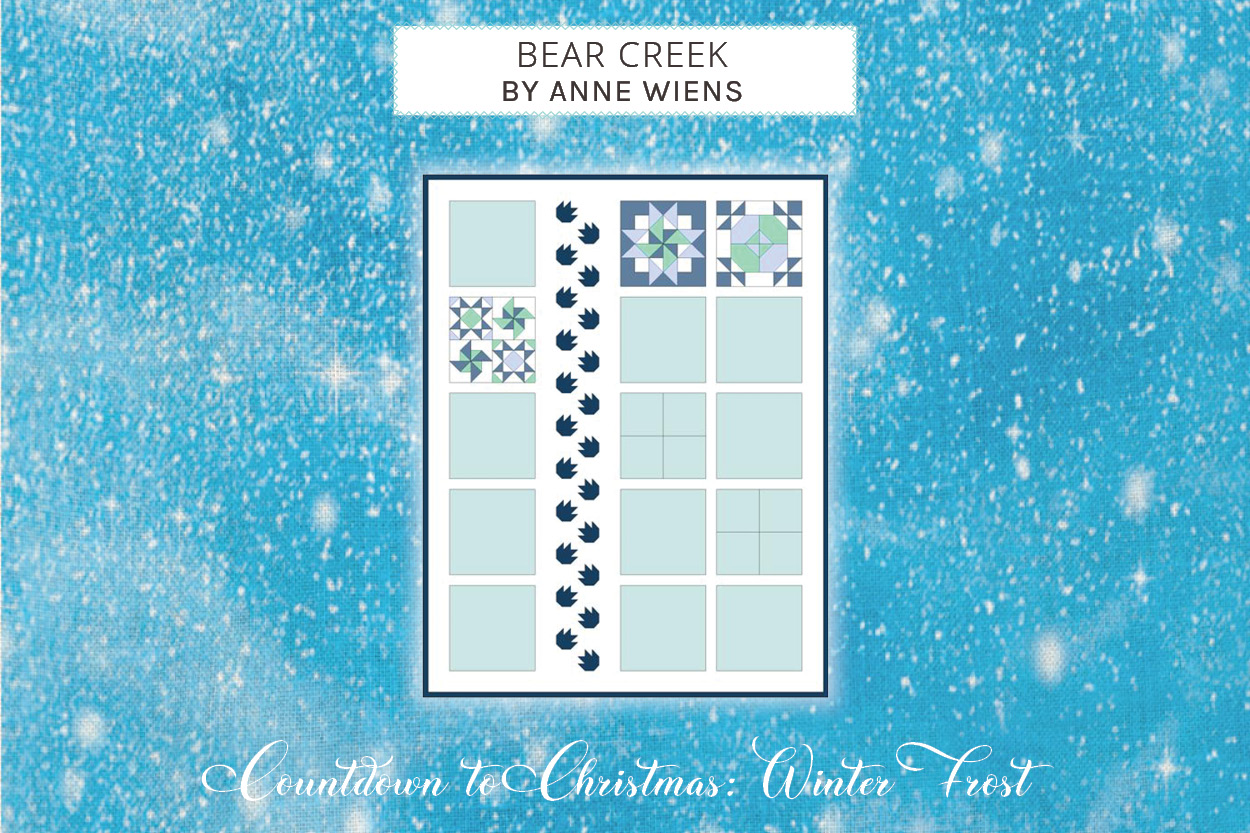
Bear Creek is one of the setting options in 2020 Countdown to Christmas - Winter Frost. For more info about this quilt-along, check out the Frequently Asked Questions and join our Moda Bake Shop Bakers group. Find all the blocks {here}.
Chef's Notes:
This quilt can be made with your choice of fifteen 12” blocks from our 2020 Countdown to Christmas collection, or as I’ve indicated here, make twelve 12” blocks and a dozen 6” blocks, and sew the 6” blocks into sets of four. I would rate this setting for intermediate quilters because, while the bear paws are simple to make, they are only 3” finished, and there are 22 of them!
YIELD
56" x 72" finished quilt
INGREDIENTS
FROM 1 YD DARK BLUE (49626-96 THATCHED ROYAL), CUT:
* (2) 2.5” x WOF (Width of Fabric) strips; subcut (22) 2.5” square
* (3) 2” x WOF strips, subcut (44) 2” squares
* (8) 2.5” x WOF strips for binding
FROM 2.25 YDS WHITE (30150-101 GRUNGE WHITE PAPER), CUT:
* (2) 1.5” x WOF strip; subcut (44) 1.5” squares
* (3) 2” x WOF strips; subcut (44) 2” squares
* (5) 2” x WOF strips; subcut (1) 26” and (1) 12.5” strip from each
* (2) 2” x WOF Strips; subcut into fi ve 12.5” strips
* (2) 3.5” x WOF strips; subcut into twenty-two 3.5” squares
* (1) 3.5” x WOF strip; subcut into two 18.5” strips
* (4) 3.5” x WOF strips and trim each to 27.5” long
* (2) 3.5” x WOF strips and trim each to 38.5” long
* (4) 3.5” x WOF strips and trim each to 39.5” long
(15) 12” UNFINISHED QUILT BLOCKS OR EQUIVALENT COMBINATION OF 12” AND 6” BLOCKS.
INSTRUCTIONS
STEP 1. MAKE BEAR PAW UNITS
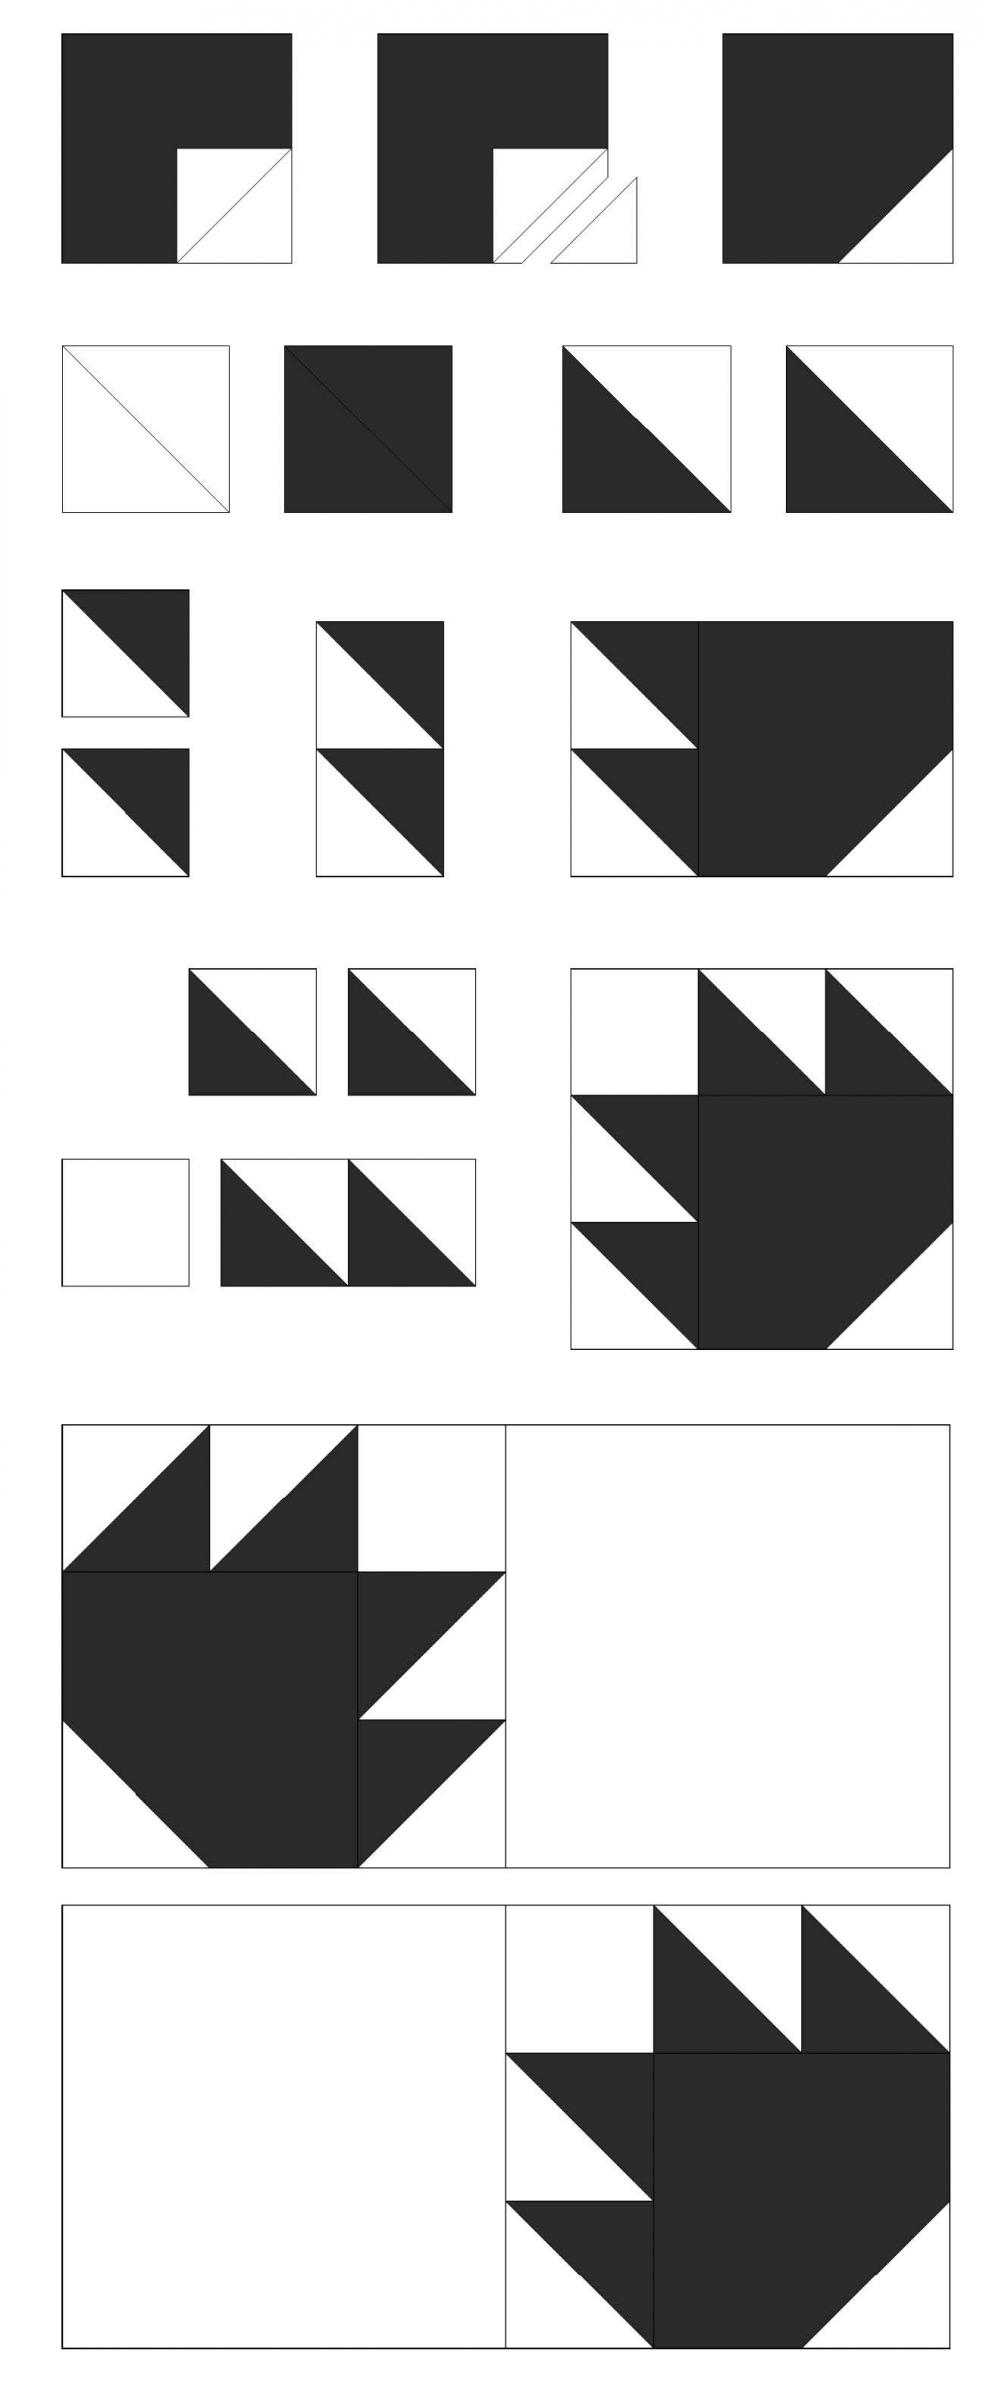
Lay a 1.5” white square on a corner of a 2.5” blue square. Draw a diagonal line on the white square. Sew on the line and trim 1/4” outside the seam. Press the corner open. Make 22 and set aside.
Cut forty-four 2” white squares and forty-four blue squares diagonally, and sew into eighty-eight half-square triangles. Trim to 1.5”.
Sew forty-four of the HSTs into twenty-two pairs as shown, and sew the HST pairs to the left side of the 2.5” blue squares from the first step. Note that the white corner on that blue square is in the lower right.
Sew the remaining forty-four of the HSTs into twenty-two pairs as shown, and sew a 1.5” white square to the blue (left) end of each HST pair. Sew these strips to the top of the 2.5” blue squares to complete your little bitty bear paw blocks.
Sew a 3.5” white square to the right side of eleven little bitty bear paws. Note the tilt of the paw block.
Sew your eleven blocks into one vertical row. After pressing, measure the length of the row. Ideally it will be 66.5” long. If the length is over 1/4” short, cut a scrap of white that is 6.5” long and about an inch wider than the distance you need to make up. Sew this strip to the bottom of your of the bear paw block row, then trim the row to 66.5” long.
Note to newbies - This is called “fudging”, and it is a legitimate tradition in quiltmaking.

Sew the four 3.5” x 27.5” white strips to the ends of the four 3.5” x 39.5” white strips, making two 3.5” x 66.5” strips. Sew one of these strips to each side of the row of bear paw blocks. Set this section, and the other two 3.5” x 66.5” strips aside.
STEP 2. ASSEMBLE LEFT SIDE
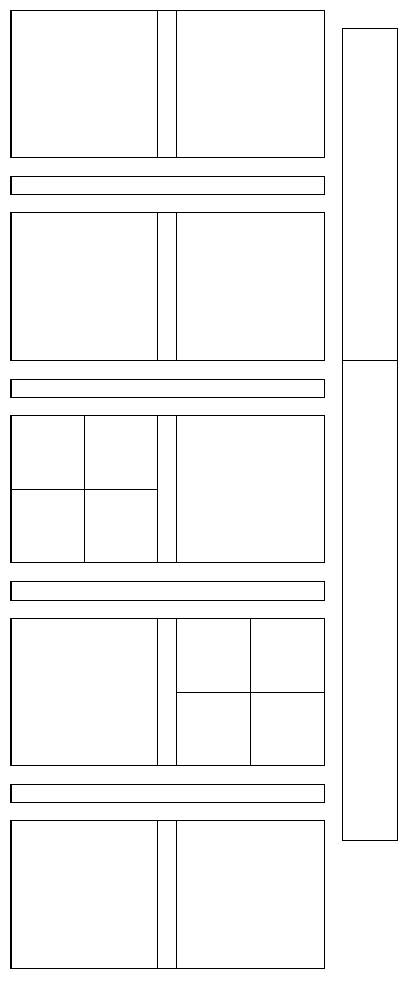
Choose four 12.5” blocks and four 6.5” blocks.
Sew the 6.5” blocks together to make a 12.5” square.
Sew one vertical row of blocks, separating the blocks with 2” x 12.5” white strips.
(Notice that I put my block of four 6.5” squares in the second position in this row. If you didn’t make any 6.5” blocks, just substitute another 12.5” block here.)
Once the row is sewn and pressed, measure its ength. If it isn’t 66.5” long, “fudge it” just like we did in the previous section.
Sew a 3.5” x 66.5” white strip to the left side of the row.
Set aside.

STEP 3. ASSEMBLE RIGHT SIDE
Sew the remaining eight 6.5” blocks together to make two 12.5” squares.
Lay out the blocks as shown and sew into pairs, of blocks, with each pair separated by 2” x 12.5” white strip.
Next, sew the pairs into a vertical row, with a 2” x 26” white strip between each pair of strips.
Once the row is sewn and pressed, measure its length. If it isn’t 66.5” long, “fudge it” just like we did in the first two sections.
Sew a 3.5” x 66.5” white strip to the right side of the row.
STEP 4. ASSEMBLE THE QUILT
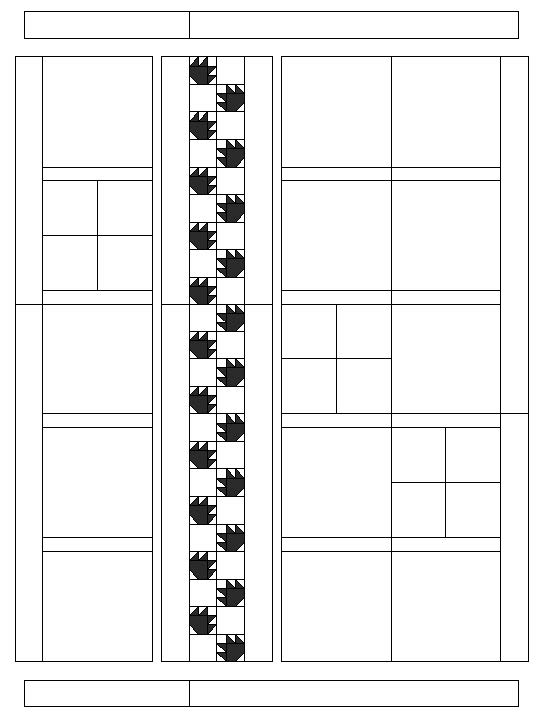
Sew the left side section to the center bear paws section.
Sew the right side section to the center bear paws section.
Finally, sew the two 3.5” x 18.5” white strips to the ends of the 3.5” x 38.5”. Sew one strip to the top edge of your quilt and the other to the bottom edge, to complete the quilt top.
Anne Wiens

Comments