Welcome to Moda Fabrics!
Garden Home
Garden Home
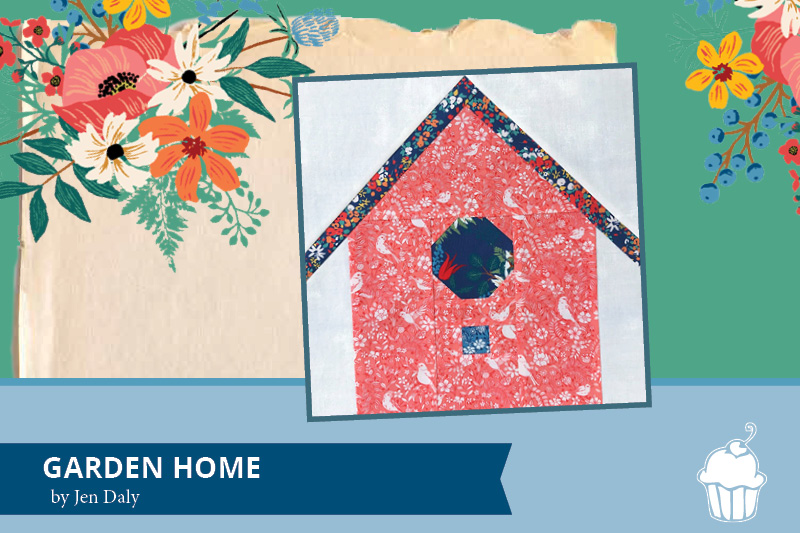
6" or 12" block
![]()
6” BLOCK
From Fabric 1 (door), cut:
{A} (1) 2” square
From Fabric 1 (post), cut:
{B} (1) 1” square
From Fabric 3 (House), cut:
{B} (6) 1” squares
{C} (1) 1” x 2” rectangle
{D} (1) 1½” x 2” rectangle
{E} (2) 2” x 3” rectangles
{G} (1) 3” x 6½” rectangle
From Fabric 4 (Roof), cut:
{H} (2) 4” squares
From Background Fabric, cut:
{F} (2) 1¼” x 3” rectangles
{I} (2) 3½” squares
12” BLOCK
From Fabric 1 (door), cut:
{A} (1) 3½” square
From Fabric 1 (post), cut:
{B} (1) 1½” square
From Fabric 3 (House), cut:
{B} (6) 1½” squares
{C} (1) 1½” x 3½” rectangle
{D} (1) 2½” x 3½” rectangle
{E} (2) 3½” x 7½” rectangles
{G} (1) 5½” x 12½” rectangle
From Fabric 4 (Roof), cut:
{H} (2) 7½” squares
From Background Fabric, cut:
{F} (2) 2” x 7½” rectangles
{I} (2) 6½” squares
![]()
STEP 1. MAKE UNIT A
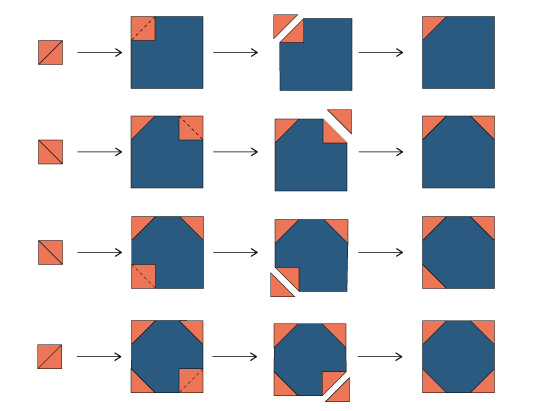
On the wrong side of 4 house print 1½” squares, draw a diagonal line from corner to corner. Layer a marked background orange print 1½” square atop one corner of the blue print #1 3½” square with right
sides together and raw edges aligned as shown. Stitch the pair together on the drawn line. Trim seam allowance to ¼”.
In the same manner, sew an orange print 1½” square to the remaining corners of the blue print #1 3½” square. Sew, trim, and press to make a Unit A.
STEP 2. MAKE UNIT B
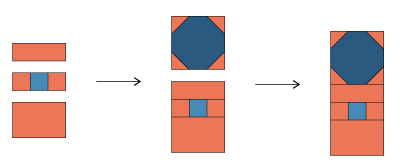
Lay out blue print 1½” square and 2 orange print 1½” squares in a row with the blue print square in the middle. Sew the pieces together to make a Unit B.
![]()
STEP 3. MAKE DOOR
Lay out Unit A, Unit B, orange print 1½” x 3½” rectangle, and orange print 2½” x 3½” rectangle as shown. Sew the pieces together to make a Door Unit.
STEP 4. MAKE HOUSE
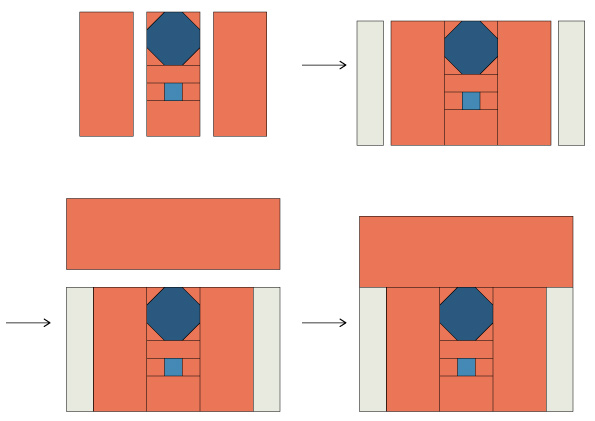
Lay out Door Unit, 2 orange print 3½” x 7½” rectangles, 2 background 2” x 7½” rectangles, and orange print 5½” x 12½” rectangle as shown. Sew the pieces together to make a Birdhouse Unit.
STEP 5. ASSEMBLE BLOCK
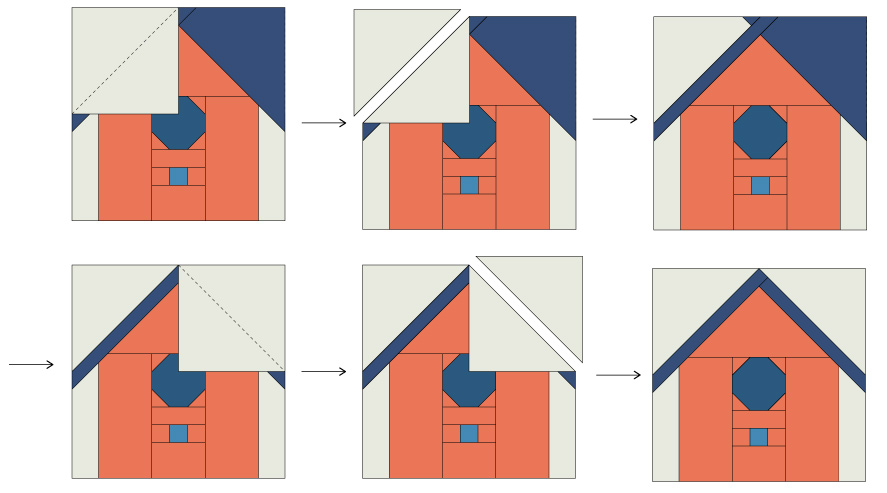
On the wrong side of 2 blue print #3 7½” squares draw a diagonal line from corner to corner. Layer a marked blue print #3 7½” square atop the upper right corner of the Birdhouse Unit with right sides together and raw edges aligned. Stitch the pair together on the drawn line. Trim seam allowance to ¼”. In the same manner, sew the remaining marked blue print #3 7½” square to the upper left corner ofthe Birdhouse Unit. Sew, trim, and press. On the wrong side of 2 background 6½” squares draw a diagonal line from corner to corner. In the manner described in step 1 above sew a marked background 6½” square to the upper right corner of the Birdhouse Unit. Sew, trim, and press.
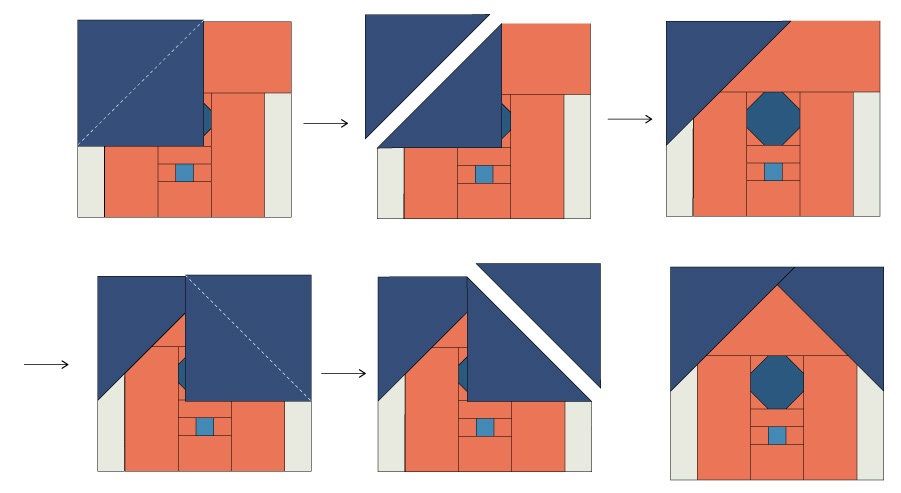
In the same manner, sew the remaining marked background 6½” square to the upper left corner of the Birdhouse Unit. Sew, trim, and press to finish the block.
Jen Daly
blog: Jen Daly Quilts
Find all Summer in the Garden posts by clicking {HERE}.

Comments