Welcome to Moda Fabrics!
Blockheads ~ Block 1
Blockheads ~ Block 1
Finally! It's happening here - the Blockheads Block of the Week is starting. Today.
Block No. 1 is Whirligig from Lynne Hagmeier of Kansas Troubles.
Lynne will be sharing her block and maybe some tips and tricks for her wonderful layered patchwork technique on her blog - Kansas Troubles Quilters.
So you know, there will be a total of forty-eight - 6" finished blocks from Lynne, Betsy Chutchian, Lisa Bongean, Jan Patek and Jo Morton. And me.
Each block will be available as a free download pattern that can be printed in black and white on your home printer. Or just saved as a download on your tech-toy.
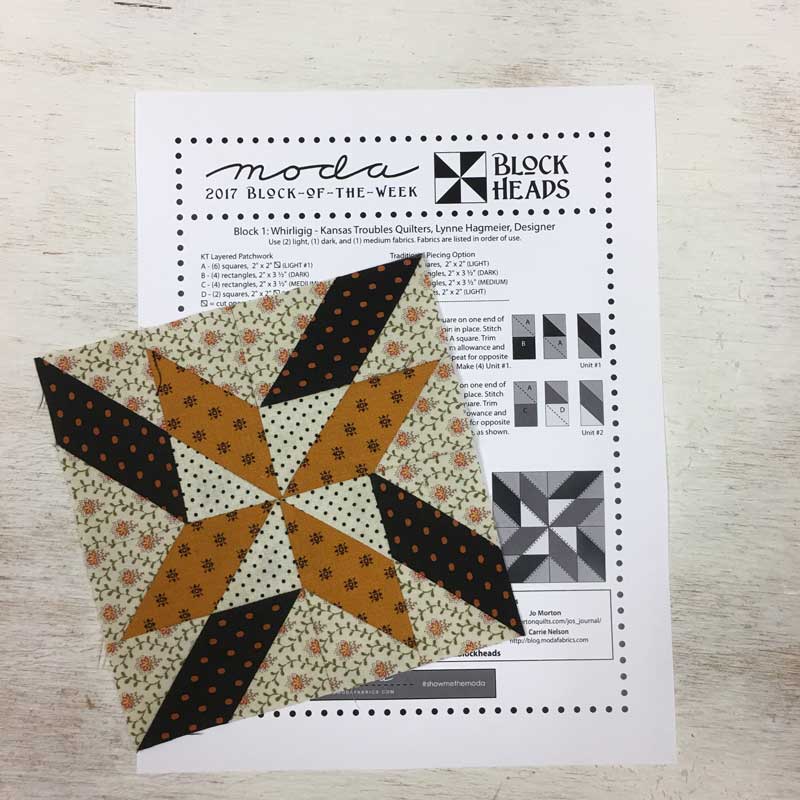
All of Lynne's blocks can be made using her layered patchwork technique or the "old-fashioned pieced way".
Isn't that block gorgeous? That's Tammy's - one of two she made. She's going to make one set of blocks using a scrappy "Fall palette" mixing fabrics from different collections and designers. The second set will be made using her favorite French General scraps.
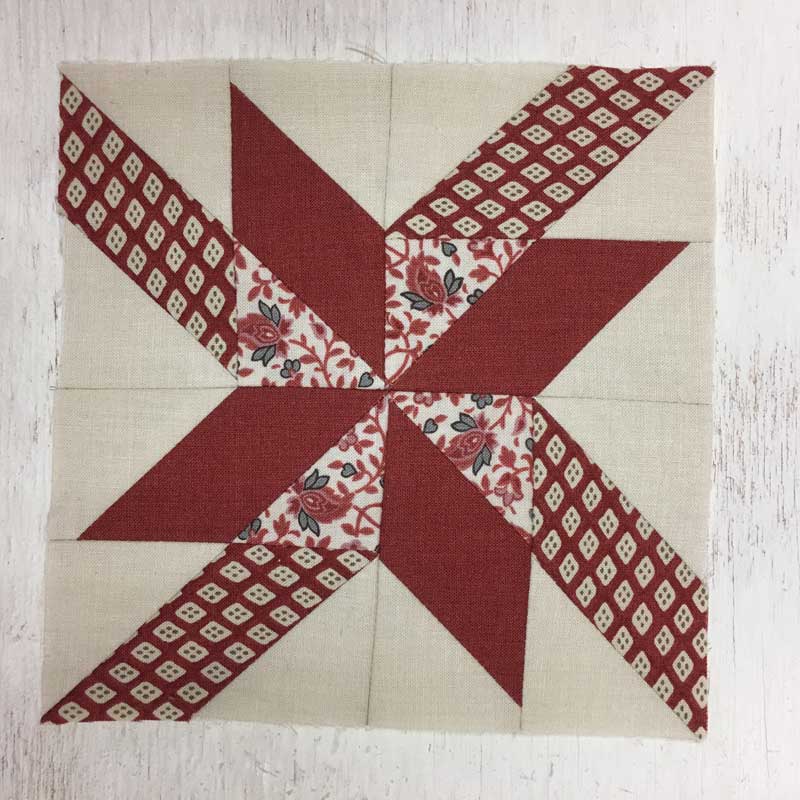
Chelair loves Primitive Gatherings fabrics and she's going with a red, white, tan and blue-navy Patriotic theme - these prints are from Old Glory Gatherings. (She said she'd have made a second block but with her grandsons playing baseball this weekend, much of her time was spent at the ballpark.)
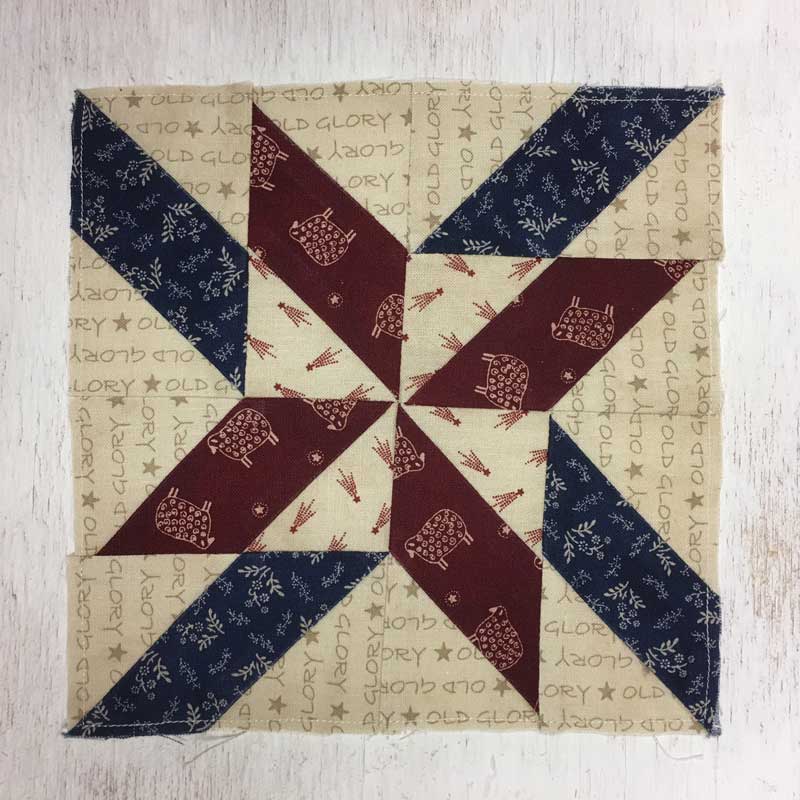
Do you see the stay-stitching on the outside edge of the block? For blocks that will probably get some handling before the quilt is finished next year (!), this is a great way to minimize stretch, fraying and distortion.
Simply use your regular stitch-length and stitch around the four sides of the block approximately 1/8" from the edge.
If you remember, I'm using a scrappy assortment of blue Reproduction prints. I was going to use a creamy white-ivory muslin for my background but after piecing a block, I decided to make a change.
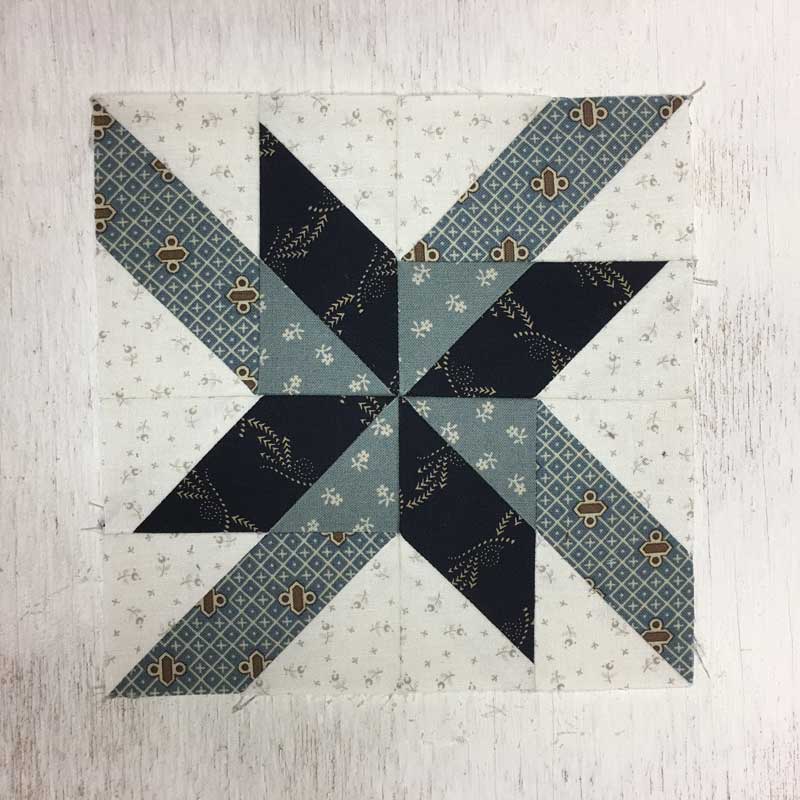
This background is from the upcoming Snowberry collection from 3 Sisters - SKU 44145 11.
I love sewing with the Premium Muslin so I've already started cutting that up for another project so stay tuned.
This block goes together quickly and fairly easily, it's made with "connector corners" or sew-and-flip. I know... everybody calls it "flip and sew" but that's just wrong. You sew first, then flip. Whether you draw the line, use Clearly Perfect Angles from New Leaf Stitches or the Sew Straight template from Quilt In A Day, it's a terrific technique. Right up until you have to trim off all those pesky corners.
So I have a tip/trick to share, it's something I saw another quilter doing in a class many, many years ago and have used ever since. It's not rocket-science but it makes trimming the corners a little less monotonous. (And faster.)
You'll need a cutting mat with a grid, a 6" x 12" or 3" x 18" rotary ruler and a rotary cutter.
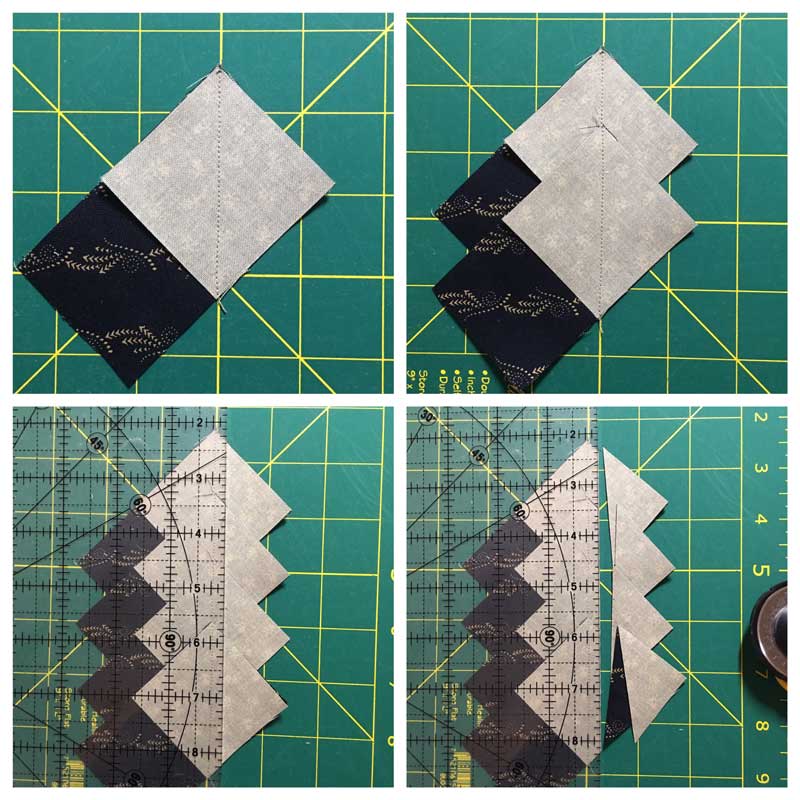
Place the first piece on the mat aligning the stitching line with a grid line on the mat. Off-setting the next piece a little bit, layer a second piece keeping the stitching line on the grid of the mat. Continue until you have four pieces. (You can do more but four works well for me.) Place the 1/4" line of your ruler on the stitching line - or a little less for a scant 1/4" - and trim through all the layers. Voila!
The time you save will allow you to make another block.
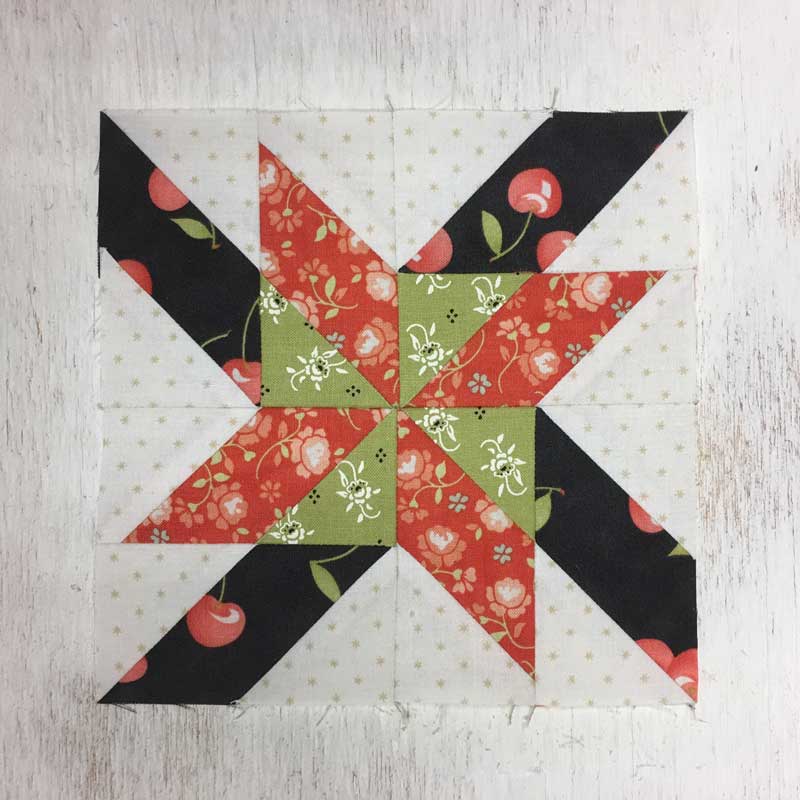
Fig Tree & Co. prints from Farmhouse and Chestnut Street and a background from Primitive Gatherings Liberty Gatherings.
So that's Block 1 - Whirligig.
Be sure to go visit the others to see what they made:
- Lynne’s Blog / Facebook / Website
- Betsy’s Blog / Facebook / Instagram
- Jan’s Blog / Website
- Jo’s Blog / Instagram
- Lisa’s Blog / Website / Instagram
Then check #modablockheads on Instagram and Facebook for more pictures.
UPDATE: There is now a Facebook group for the Moda Blockheads.
Happy Wednesday!

Comments